Welcome to BuildScan! A revolutionary new, multi platform tool – that will change the way you manage your construction, new build and renovation projects. At its very core, BuildScan has been created to be as simple as possible. Unlike some well-known project management or field service management tools that front-load with varying features and levels of membership, anyone can pick up BuildScan and start using right away, alone or alongside their entire team. In this blog post, you’ll find everything you need to hit the ground running after you’ve downloaded the app or launched the web platform.
Before we begin, here are a few handy terms:
Workspace: A workspace is the umbrella into which all sites and plots will be stored. For a house-builder, the project could be a region.
Project: A project is a development that can be broken down into one or multiple plots.
Plot: A plot is an individual property found within a project. For homebuyers: this will be your house or apartment.
Defect: A defect is an issue, or a snag that you can log within a plot.
Task: A task is a defect that’s been assigned to a user or team within the app.
Report Code: A code found on a BuildScan PDF report, that will import its content into the app.
CREATING WORKSPACES, PROJECTS AND PLOTS:
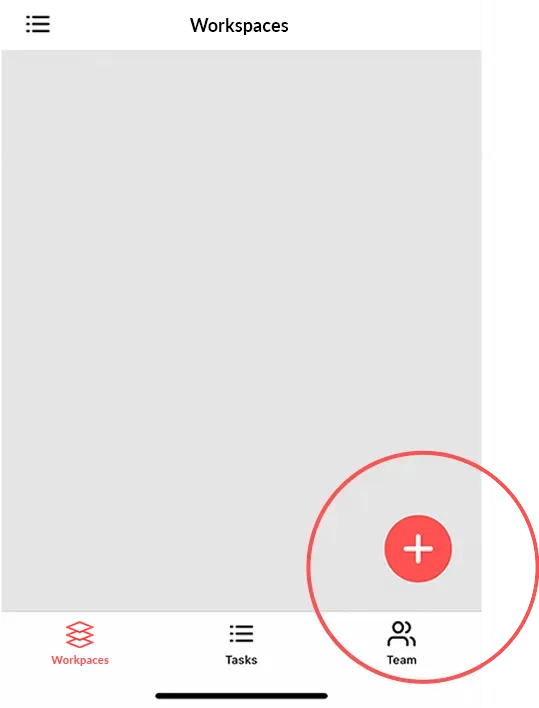
To create a workspace, click in the + on the bottom right hand corner.
Once created the workspace will open automatically, from here you can use + the once again to add a project.
Use the + button to add a plot.
ADDING DEFECTS TO A PLOT:
You can choose from 2 different layouts when adding defects. Start by selecting Add Defects
1: SINGLE DEFECT
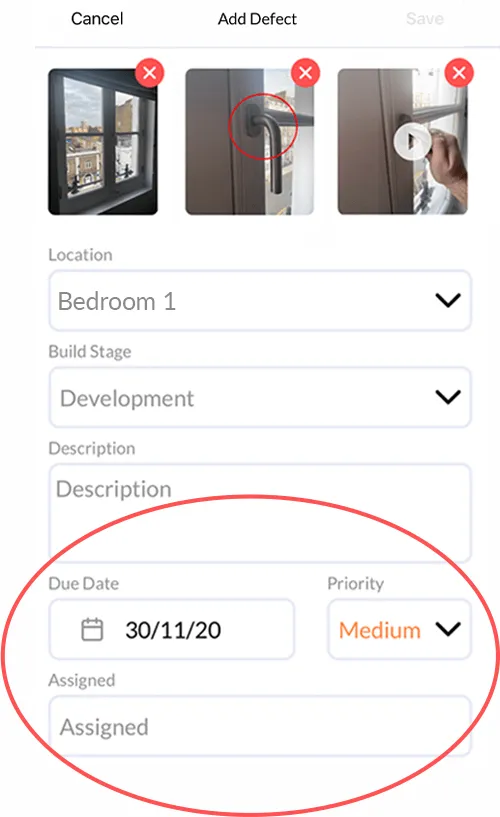
Select this layout to add 1 individual defect. Upload or record up to 4 photos and videos.
2: DEFECT PICKER
Take an overview image and select it’s location. Here you can mark and add multiple defects by following the same process as above.
Complete the process by assigning your defect to a build stage, and clicking save.
COLLABORATING AND ASSIGNING TASKS:
Once you’ve created a defect, you can allocate a priority rating and due date for completion.
Here you can assign a defect to yourself or someone else. Once assigned, defects will appear within that user’s tasks tab.
Within the team tab, you can add and manage team members, contractors, clients etc. Once invited, you can assign them to workspaces, projects, plots and defects.